Step 2: Installing Girts and Tie Beams
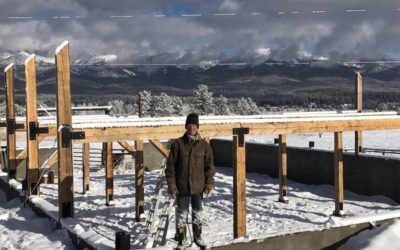
Once your posts are in place it’s time to start installing some of your girts. This will stiffen up your frame so that you can install more of the timber members that go into your barn. Then you need to cut all of your girts and install them with 4-inch rigid structural screws, available by emailing [email protected]. Make sure you use a level so that they’re all level.
Now it’s time for your tie beams. These are usually 6×10 and range from 16 to 20 ft long. You’re going to want to cut them to length, measure the bottom of your posts, refer to your plans, make sure the measurement between your posts and the measurement on your plans match as closely as possible. If you’re within a 16th of an inch, I wouldn’t worry about that. But if you’re an inch and a half off, I would definitely worry about that. So, make sure that those two measurements coincide with each other. Then cut your tie beam and lift it in place.
Step 3: Floor Joist and Loft Decking
Now it’s time to put your floor joists in. There’s a wide range of possibilities when it comes to your floor joists. You can do 6×6 floor joists, 24 in to 36 in on center with 2-inch thick or inch and a half thick tongue and groove loft decking. You can do 2×8, 2×10, 2×12, 16 in on center with just one-inch rough-cut pine. Just a lot of different things you could do.
I would just recommend if you saw your lumber out, if you have large logs, cut 2×10, 2x8s. If you have small logs, you can use a lot of logs that you would have been firewood for floor joists just by flattening two sides. So, it just depends on the material you have. If you have a lot of excess material that’s short, and you can cut a lot of 6 to 8 ft long floor decking, use that.
Step 4: Rafters and Rafter Beams
Now we’re going to talk about rafters, the rafter beams, the collar ties, the king posts, the lean-to rafters, all that stuff.
So, go ahead and put your floor deck on so that you have a surface to work off of. You really can build off of that deck, piece by piece, especially if you build a jib pole. That would work really well to lift those rafters in place. If you only have a partial loft deck, it might be a good idea to go ahead and install some temporary scaffolding, some temporary loft in that area, just as a working platform that you can disassemble later. It’s really worthwhile to have that working platform. You don’t have to walk up and down ladders all the time.
Once you have that nice stable platform to work from, and you’ve built a jib pole, then you can lift those rafter beams up into the second floor and set them in place.
If you’re building a gambrel, you would put the two side rafter beams, the lower rafter beams up first, and then the queen post. Then you put that center rafter in place.
If you’re doing a gable you could build the entire rafter right there on that second-floor deck, right in front of where you’re going to put it up. Then use the jib pole to pick it up into place. Or you can do one side at a time. Then tie everything together, especially if you have a queen post in your design to hold the center of that rafter beam. If you don’t have a queen post, you can always put in temporary queen posts and then take them out later. I know a lot of people like a clear span. They’ll use a king post. There are plans for both in the library.
When you go to place your rafters, you’re going to need the correct fasteners. For those, I recommend rigid structural screws. We carry a WoodPro brand (email [email protected] to order). But you can get something locally if you want. JK screws are fine. There are various other brands. However, I am kind of particular to the brand that we carry. If you look up the price, they’re I think last I checked, they were half the price of the GRKs. You’re going to need those screws to assemble the rafter beams, all the rafter beams and the collar ties and the king post.
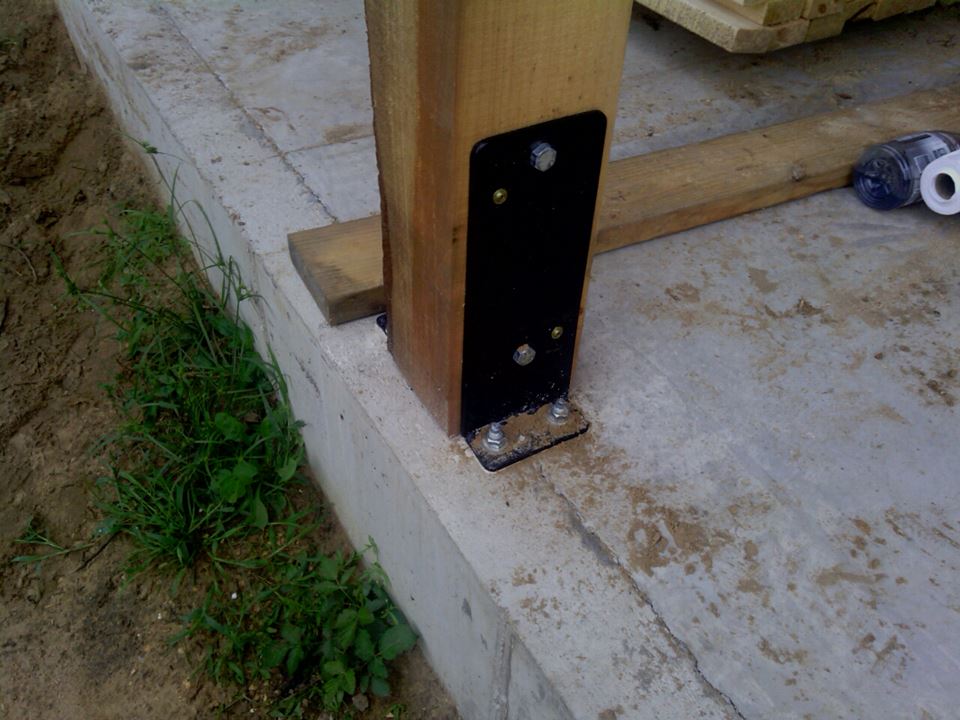
It’s up to you if you want to attach the rafter to the post with RSS, rigid structural screws. However I recommend upgrading that joint to a four-hole strap plate. Where do I find 4 hole strap plates? You can find the plans for them in our barn plans library and have them mafe in a local machine shop. Or you can email us at [email protected] after purchasing the membership to order a hardware kit for any of our barn plans. Our hardware is made in a local shop here in Michigan. If you need a quote, send us an email. Either way, the product will be made in the USA.
The most important thing is you use hardware that is adequate. There are lower-cost hardware alternatives out there, and a lot of them are name brand. But the difference is big. The tee plate that you would get from, say, one of the big brands weighs 3 lbs, okay? But our tee plates weigh 10 lbs. So ours are, I think, five times as thick, something like that. They’re just ridiculously large. And the Simpson brackets are not designed for this use. We designed our tee plates for this specific use.
So, if you’re going to go with a different company making your brackets or just buying brackets from a different company, make sure they’re 1/4in thick, and you use two per joint. Use half-inch bolts at least. You can go up to 5/8 if you want and make sure they are at least close to the specs that are in the library. If you don’t want to get them from me, that’s fine. That’s why I put the drawings in the hardware in the library so that you can get your brackets from a local machine shop. Take these drawings to any local machine shop that has a plasma cutter and a lot of them do now, a plasma CNC machine. They’ll be able to burn them out for you, no problem. So, there’s really no reason not to.
Step 5: Purlins and Roofing
Now it’s time to put those purlins on the roof. The purlins are the connecting member from rafter to rafter. That’s what holds the roof in place. Whether it’s steel or one by one by rough-cut or OSB or whatever you decide to put on your roof, 3×6 in spaced 24 in on center that will be supporting that material. Remember these rafters are 10 ft apart. So, you need that big purlin across there to span that distance. These are laying flat. You can stand them up. So, if you need a higher snow load capacity, just rotate them 90° and stand them up. And then, if you do that, make sure you block between every one of those. That’ll keep the girt from shifting when it’s up there.
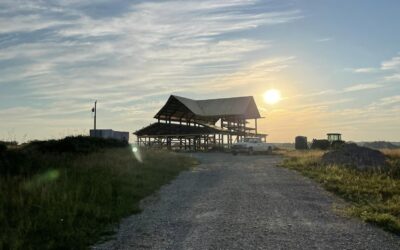
So, once you get your girts in place, then you can decide whether you’re going to put roof cut OSB steel on the roof. This roof, we decided to go with steel because it was just a quick pavilion. And we wanted to get it done quick and low cost. It’s extremely low cost. It cost me about six grand to build this 20 X 30 King Post Pavilion.
Step 6: Siding
For siding use what you have and what you like. I reccomend 1×10 board and 1x3batten but you can use steel. Just please don’t use vinyl. I won’t tell you how to build your barn, its your barn. (But don’t use vinyl. It’s garbage.)
Step 7: Windows, Doors, and Finishing Touches
If you’re going to add a cupola, you’re going to want to do that while you’re roof decking. Dormers, windows.
You want to frame your windows with the girts that are on the side. It’s real simple, just like a picture frame. Just make a box, not much to it. Cut a hole, frame it, and put your window in. You don’t have to worry about headers or whether the supporting wall will be affected or anything like that because everything is supported by these posts and these bents. These trusses, these are bents. So this post and the rafter, it’s all one system. It’s called a bent, and that’s what supports these buildings. Anythign in between you can cut to install a window or door. If you had the budget you could probably install the entire space with windows if you wanted to. It’s designed that way.
You can put sliding doors on, you can put overhead garage doors on, you can build your own doors, you can buy doors, whatever you want to do. They’re accounted for in the barn plans library.
If you want to get deeper involved with everything, sign up for the free course on our website, and I’ll send you videos that detail how to do every step so you don’t get anything wrong.
Congratulations! You’ve successfully navigated the broad overview of post and beam barn construction. For more in-depth guidance, sign up for our free post and beam barn building course on barngeek.com, where detailed videos and written lessons await. Join our facebook group to ask questions and talk to people who have already built thier barns.
Remember, the key is to learn, teach, build, and thrive. Happy building!




Do you have barn plans that would have a full basement underneath ?
We do not provide foundation plans. How you build your foundation including or excluding a basement or crawlspace varies based on your location, local zoning, and soil type.