You can build this hen house with these free chicken coop plans. It is easy to do. All you need is some rough cut lumber, a hammer, nails, and a circular saw. You can even build one with regular dimensional lumber from your local lumber yard. I built one like this for my chickens last fall.
Download a PDF of these plans for free!
Enter your name and email and you will gain access to these plans and more.
Now let’s continue with those Free Chicken Coop Plans…
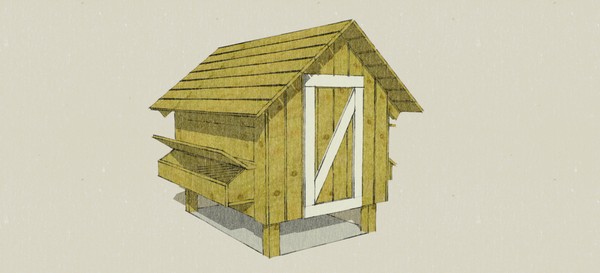
I have found that with this free chicken coop plans design it is easy to gather the eggs, feed, and water my chickens. I use one of the side boxes for nesting boxes and the other side for easy access to food and water. This coop is similar to the Amish built chicken coops you may have seen for sale for as much as $2,000. I built mine with some left over lumber from another project so it turned out to be free! Lets see how it is done step by step.
To see any of the illustrations on this page in larger more detailed use this gallery and expand it to full screen. You can close full screen by hitting your Esc. key.
FoundationThe first thing you will want to do is establish a good foundation for your chicken coop. A concrete slab works nice but it is not necessary. It may even be a good idea to support the posts with some landscape path blocks. Then your chickens will have a place they can get out of the sun and fluff their feathers with the exposed dirt. Chickens like to do that in the summer to cool off.
Posts and Joists
Space your landscape blocks 4′ apart at two 6′ intervals. You will be set up to build a 4×6 foot chicken coop. A hen house this size will comfortably hold 10 – 12 hens.
First you will need to lay 2 4′ long 4×4 posts on the ground spaced 6′ apart.
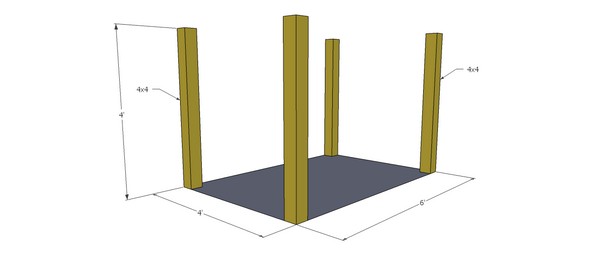
Measure up 12 inches and nail your first floor joist in place. I used 2×6 for this because that is what I had, but 2×4 joists might work just as well, after all chickens don’t weigh much.
Next do the same thing with another 2 posts.
Now set them up and nail 4′ joists to the ends. Nail the rest of the floor joists in place so that they look like this.
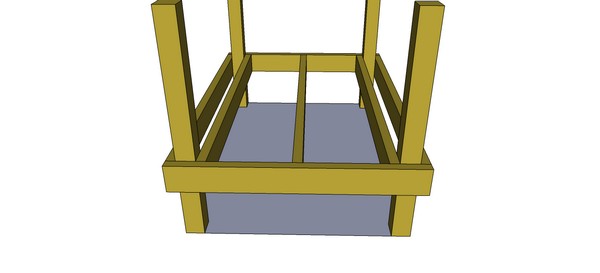
Use a square to check all of your posts and joists to be sure they are square and plum.
Floor
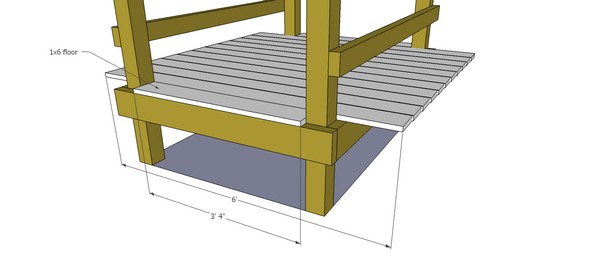
Now it’s time to build the floor of your chicken coop. I used 1×8 rough cut lumber for this but you may use plywood as well.
Lay the lumber out so that it overhangs the sides of the coop by 1 foot on each side. This is for the side nesting box and the feed and water box. Now nail the flooring material to the joists with 8d nails. Make sure you keep checking for square and that you are careful to get all the boards flush with each other. One trick you can do to save time is to nail the boards down before you cut them to length then measure and mark all the boards and cut them all at the same time.
Girts and Headers
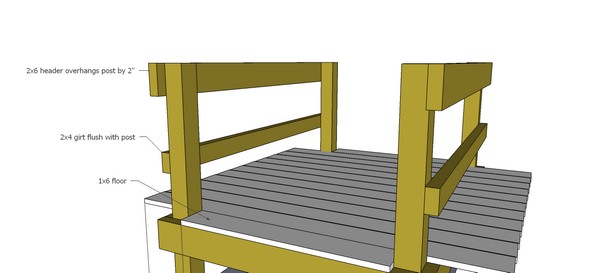
Now you can add your girts and headers to the chicken coop. Make sure to overhang your headers 2” past the posts. This will support the 2 end rafters. It is important to do this so that you will can nail the siding to the rafters and the end joists.
The 2×4 girts will need to be attached 8 inches above the floor it supports the nest box lid, dividers and window.
Rafters
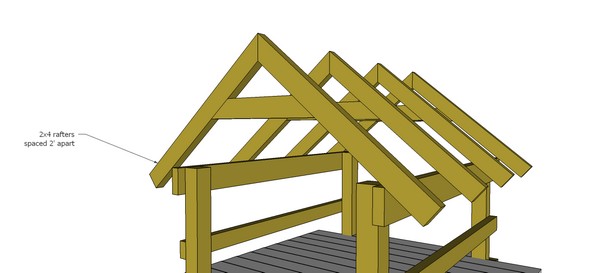
Now build 4 rafters as shown, and attach them to the headers 2′ apart. The rafters in these free chicken coop plans have a 10/12 pitch but you may build your rafters with whatever angel suits your tastes. Just make sure to add the cross brace. The cross brace doubles as the top of the door frame.
Roof and Siding
The next step is to attach roof sheathing to the rafters. You can use rough cut 1×8’s or plywood to do this. Decide how much of an overhang you want and cut the pieces to fit. Now attach 1×8 vertical siding to the front and back of the coop leaving an opening for the door.
The only siding you need to attach to the sides are single pieces to cover the posts, the rest of the sides will be covered by the nesting boxes and windows.
Nesting Boxes
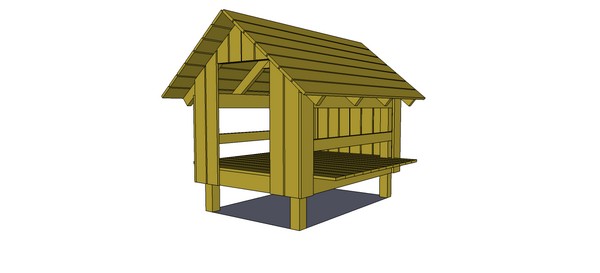
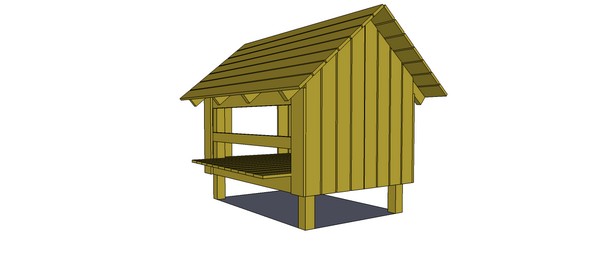
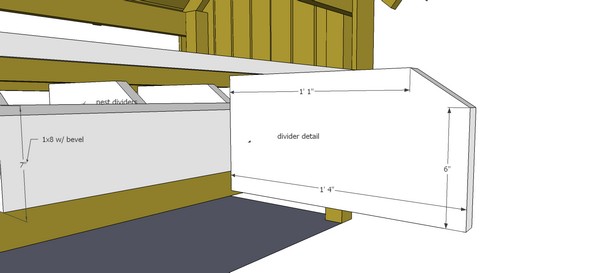
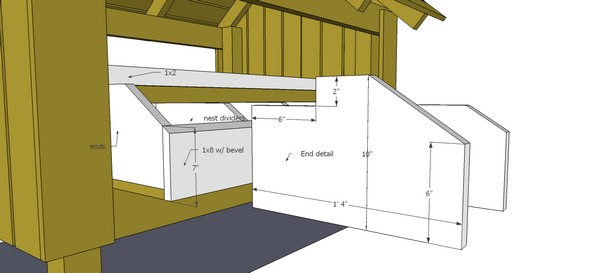
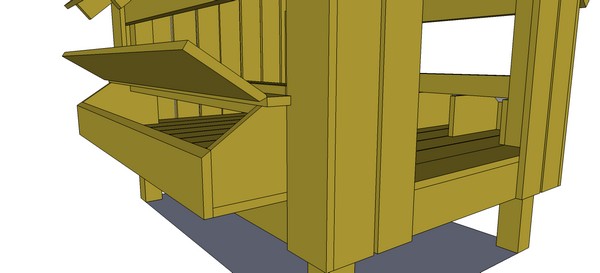
After you nail the siding in place cut some pieces for the nesting boxes and food box as shown. Make 4 end pieces, 2 lids, 2 sides, and 4 dividers.
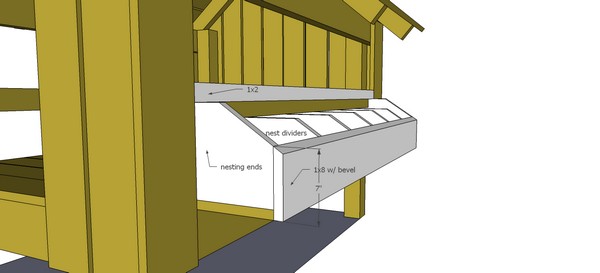
Assemble all the pieces as shown. Make sure to space the dividers at 1 foot increments to make comfortable sized nesting boxes. Attach the lids with hinges, use a scrap piece wood to support the lids in an open position.
Windows
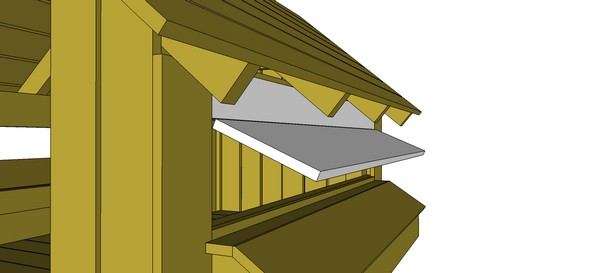
All you need for the windows is some hardware cloth and 2 pieces of 1x stock cut to fit the opening. Attach the hardware cloth to the inside of the opening with staples and the 1x to the outside with hinges on the top. Cut some scrap pieces to support the window covers when you want them to be open.
Door
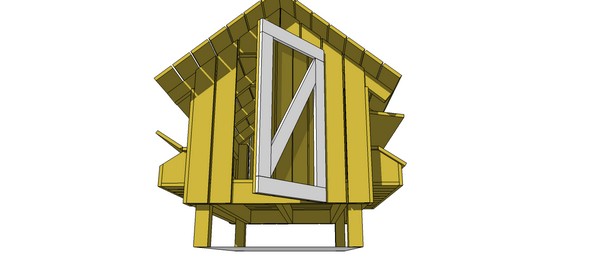
Now you can build your door. Use 1×4’s to frame it out as shown and plywood or rough cut lumber to fill in the frame. Attach hinges and a latch. A garden gate latch works well for this or you can make a simple turn latch with a piece of scrap lumber and a nail.
Finishing Touches
There are a few things you can do to add some finishing touches to your chicken coop. Cut a small hole about 8×10 inches for the chickens to go in and out. Use a 2 foot long piece of 1×8 to make a ramp. Cover the eves with 1x or plywood. Nail shingles or other roofing to the roof boards. Build an outdoor covered chicken run. And, finally paint your new chicken coop to match your backyard decor.
Download a PDF of these plans for free!
Enter your name and email and you will gain access to these plans and more.
Free Chicken Coop Materials List:
Legs:
2- 4×4″ 8 foot
Floor joists:
2×6″ or 2×4″
1- 8 foot
11- 6 foot
Header:
2- 2×6″ 8 foot
2- 2×4″ 6 foot
Rafter:
8- 2×4″ 6 foot
1- 2×4″ 8 foot
Gable End Siding:
16- 1×6″ 6 foot
4- 1×6″ 4 foot
Roof Sheathing:
14- 1×6″ 8 foot
Nest box trim:
2- 1×2″ 6 foot
Nest box:
3- 1×8″ 8 foot
2- 1×2″ 6 foot
2- 1×8″ 6 foot
Windows:
2- 1×6″ 6 foot
2- 1×8″ 6 foot
Door:
2- 1×3″ 2 foot
3- 1×3″ 4 foot
Read More about Chick Coops below.
36 egg incubator reveiw. Trying an incubator from amazon.
In may of 2024 my husband and I decided to purchase an incubator in the hopes of hatching some cute silkie chicks for our son to enjoy. We bought eggs from local breeders to hatch along with sticking some layer mixes from our own farm in. As a busy family with my...
The Best Treats for Your Chickens this Summer
What are the best treats for my chickens? What can I safely feed my chickens? Let's look at some common chicken treats and what makes them good for you (your wallet) and your chickens! 1. Food scraps Low waste, low cost, and tons of fun! What could be better? Chickens...
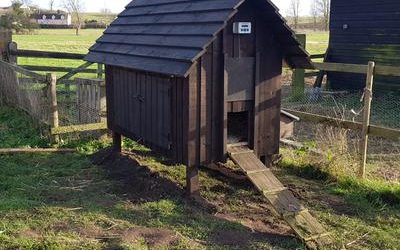
3×4 chicken coop with solar power
Built this coop from the free plan - reduced the size a bit. It can be moved around the yard - has wheels on a single axle in the centre. Light activated door is operated with solar power
Best Chicken Feed
The Best Chicken Feed by Isabelle EschWelcome to my guide on choosing the Best Chicken Feed for your chickens, an article in my series Raising Chickens for Beginners. In this article we are going over a few different ways save money feeding your chickens, as well as...
Chicken Coops and Care
Plush house for the girls
Project by Karen in Suffolk, england I found your plans and decided to use them for my new chicken house, as they seemed so simple. I changed the width and used old scrap wood for most of the build, mainly an old shed and some fencing I had sitting around. The only...
Chicken coop in Virginia
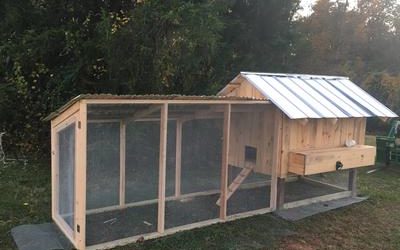
Project by Dan in Virginia I followed these plans and the coop turned out great. I made a few modifications. I skipped the windows, and made the legs about another half foot taller so the chickens would have plenty of room underneath. went with the metal roof. Really...
Plans were Great! Love our Coup.
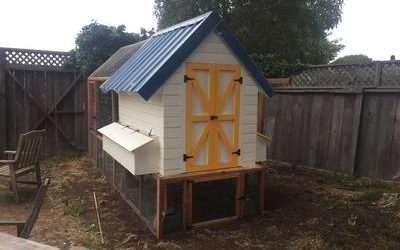
Project by Owain Elliott-Sowaal in Pacifica, CA, USA The Plans were great. I started it with my 3 year old daughter, trying to involve her. It was quite a fun project, but I pretty much did it alone. I did modify the plans a bit. I wanted the coop to be taller. I...
Tim’s Coop
Project by Tim in Tracy, CA I have 8 four week old chicks and needed a coop I could build on a weekend. I used the plans and made some minor adjustments. Thank you for having these plans on the net. It was perfect and exactly what I was looking for. Tim racy, CA


Recent Comments