STOP Wood WARPING Before It Happens
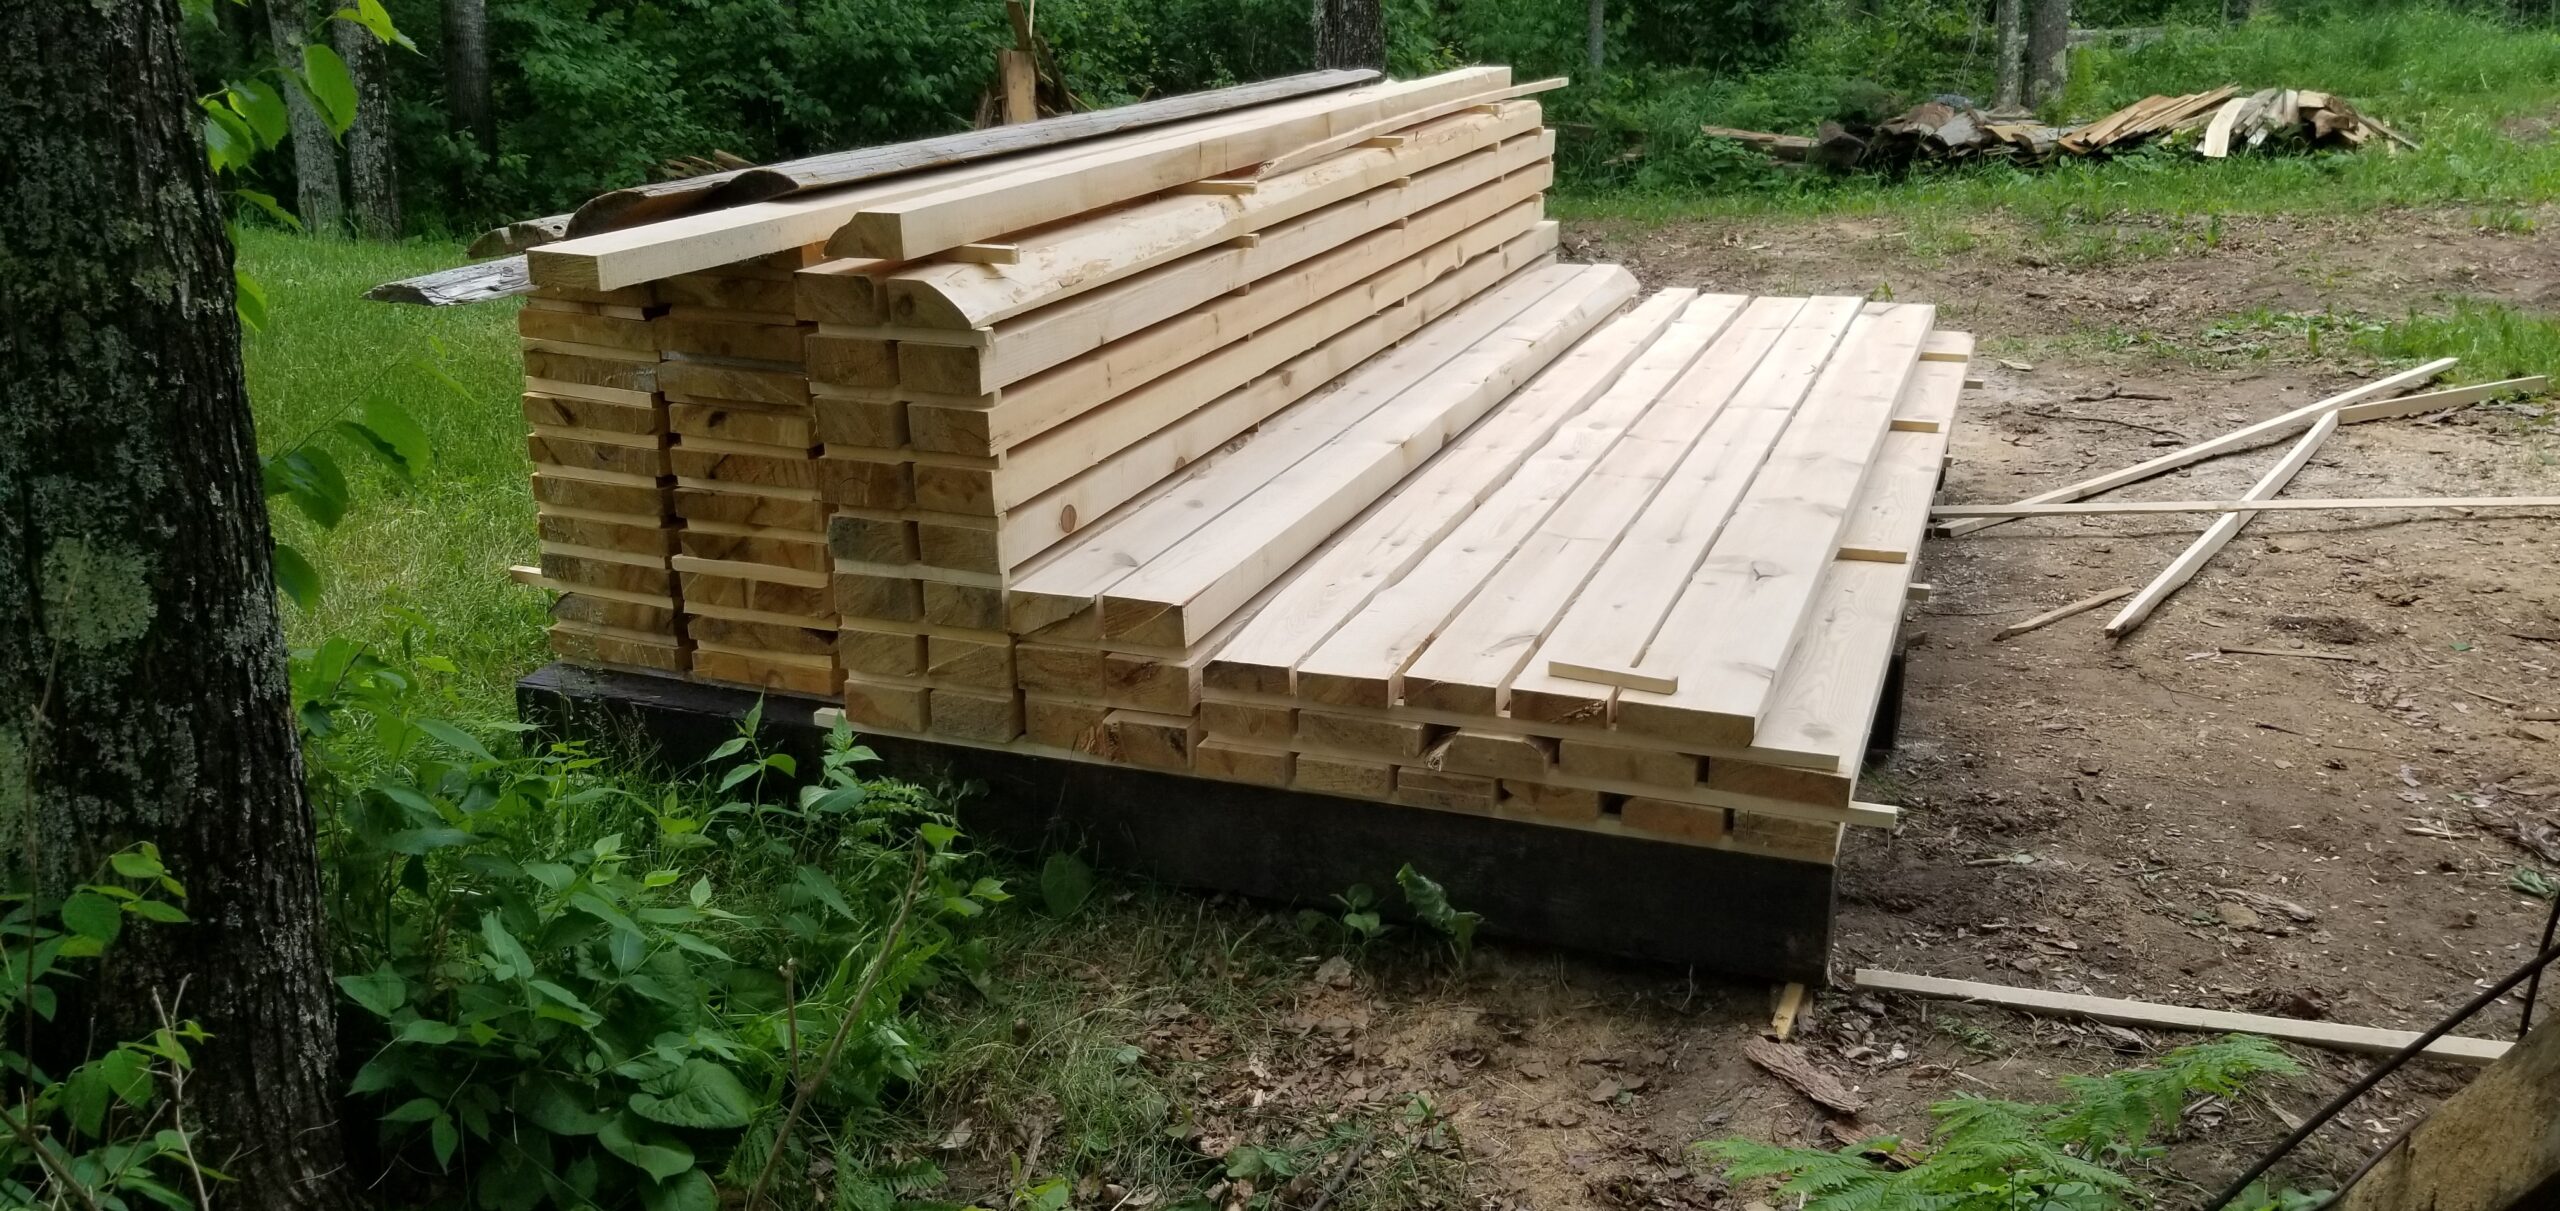
Warped lumber can ruin your projects and waste money – and nothing’s more frustrating than discovering your perfectly straight boards have turned into pretzels! The key to preventing warping is proper storage that controls moisture, temperature, and airflow. Here’s how you can keep your lumber straight and ready to use:
Choose the Right Location: Store wood in a cool, dry, and well-ventilated space. Indoor storage (like a garage or basement) is ideal, with temperatures between 60–80°F and humidity levels of 30–50%.
Elevate Lumber: Keep it off the ground (at least 4 inches) to avoid moisture absorption. Use pallets, concrete blocks, or treated wood as a base.
Stack Properly: Use flat stacking with stickers (thin wooden strips) placed between layers to allow airflow. Align stickers vertically and position heavier boards at the bottom for stability.
Avoid Sunlight and Plastic Covers: Direct sunlight and non-breathable plastic can trap moisture, leading to warping. Use breathable covers like canvas tarps instead.
Monitor Moisture: Use a moisture meter to ensure consistent levels (6–8% for indoor projects). Let lumber acclimate for 3–7 days before use.
Inspect Regularly: Check for mold, rot, or pests every few weeks. Rotate older boards to the front for use first.
Proper storage saves you from warped boards, delays, and wasted materials. Follow these steps to protect your lumber and keep your projects on track.
What tools can I use to check and maintain the right moisture levels in stored lumber?
Why Lumber Warps
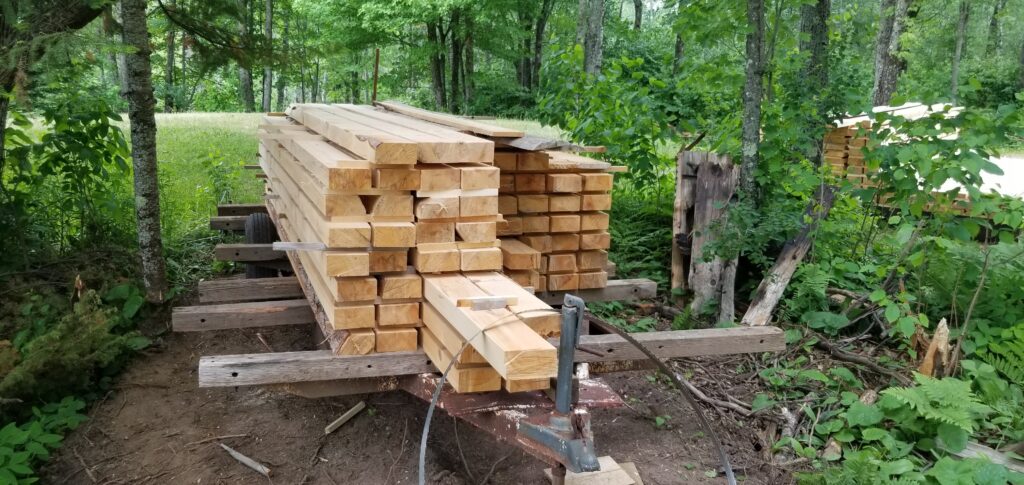
Understanding the reasons behind lumber warping is essential for preventing it – and trust me, once you know what causes it, you’ll be amazed at how much easier it becomes to avoid! Knowing the factors at play allows you to adopt better storage methods and protect your wood from damage.
Moisture Imbalance: The Root Cause of Warping
Warping often begins with uneven moisture absorption across a board – it’s really that simple, yet that complicated! When one side of the wood takes in more moisture than the other, internal stress builds up, causing the wood to bend, twist, or cup. The wetter side expands, while the drier side stays the same, forcing the wood fibers to adjust to the imbalance.
This uneven moisture absorption can happen for several reasons. Poor air circulation around a lumber stack can expose some boards to more airflow than others. Storing wood directly on concrete floors or against walls can create moisture pockets that spell trouble. Even stacking boards too tightly can trap humidity, leading to inconsistent drying.
All of the bad things that happen to wood happen because moisture is removed too quickly or unevenly. To prevent warping, the moisture content of lumber should remain consistent throughout the board. Even a small difference – around 6% – can lead to distortion that’ll drive you crazy.
The Role of Temperature and Sunlight
While moisture imbalance is the main culprit, temperature changes can make things much worse. Heat causes wood to expand, while cold makes it contract. When combined with fluctuating humidity, these temperature shifts can seriously speed up the warping process.
Direct sunlight is particularly harmful, as it heats the exposed surface much faster than the shaded side, creating a rapid expansion difference that wood simply can’t handle gracefully. Over time, UV rays also weaken wood fibers, making them more vulnerable to moisture changes. Even covered lumber isn’t entirely safe – if the covering traps heat, it can create a greenhouse effect that accelerates warping.
Indoor storage areas aren’t immune either. Storing lumber near heating vents, radiators, or in spaces with extreme temperature swings can cause similar issues, whether the wood is kept indoors or outdoors.
Common Types of Warping
Environmental factors like moisture and temperature result in distinct warping patterns that you’ll want to recognize. Here are the most common ones:
Cupping: This occurs when the edges of a board rise or dip compared to the center, creating a curved cross-section. It’s often caused by uneven drying, where one face of the board loses moisture faster than the other.
Bowing: A board curves along its length, forming an arc from one end to the other. This type of warping typically happens due to uneven moisture distribution along the board’s length or inadequate support during storage.
Twisting: This happens when the board rotates along its length, causing the ends to no longer be parallel. Poor stacking techniques and uneven drying are the usual culprits behind this frustrating problem.
Crooking: The board bends sideways along its edge, creating an S-shape when viewed from above. This often results from improper alignment during storage or uneven moisture affecting one edge more than the other.
Recognizing these patterns can help you adjust your storage practices to minimize warping before it becomes a major headache.
Choosing the Right Storage Location
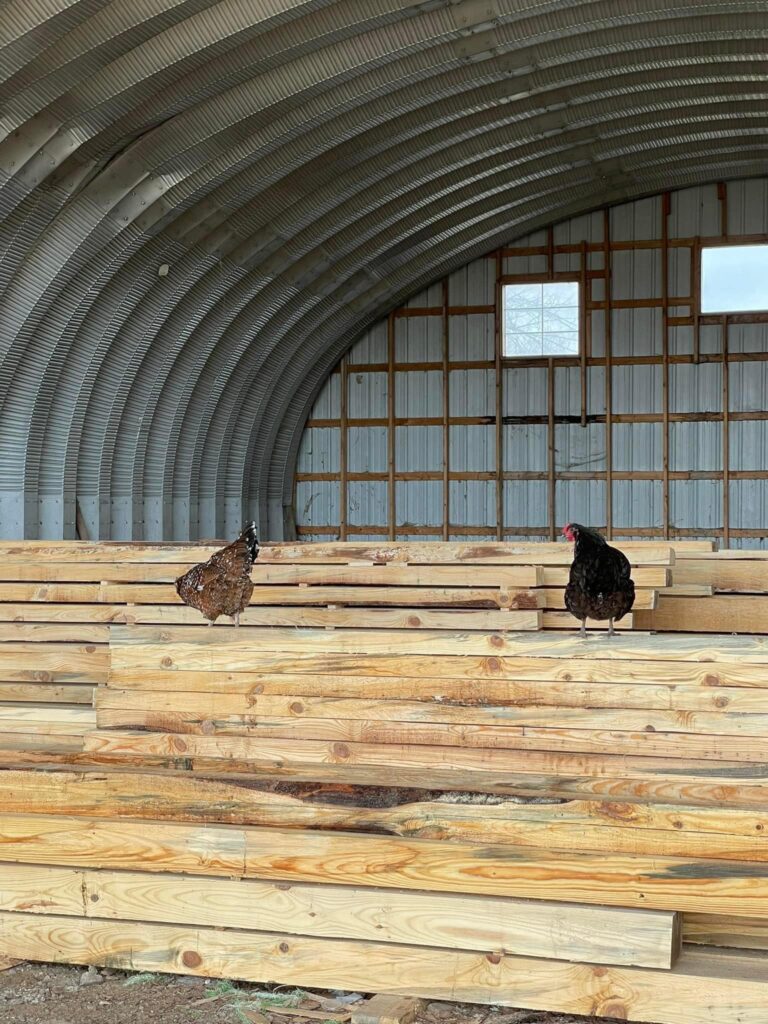
Now that we’ve covered what causes warping, let’s move on to picking the perfect spot to store your lumber. Where you store it plays a huge role in keeping it straight and stable – even the best stacking techniques won’t save your wood if the storage area is prone to moisture problems or fluctuating temperatures.
Cool, Dry, and Well-Ventilated Areas
Aim for a storage location with steady temperatures between 60°F and 80°F. Basements can work well, as long as they’re well-ventilated and free of moisture issues that can creep up on you. Proper air circulation is absolutely key – avoid cramming lumber into tight, enclosed spaces where air can’t move freely.
If you’re using a garage, consider adding a small fan to keep the air moving, especially during humid summer months when temperatures can climb above 90°F and create real problems.
Keep humidity levels between 30% and 50% to protect your lumber investment. Too much humidity allows wood to absorb moisture like a sponge, while extremely low humidity can dry it out too quickly and cause cracking. A simple hygrometer, which costs around $10–15, can help you monitor these levels and give you peace of mind.
Whenever possible, indoor storage is definitely the better choice. Sheds, garages, and workshops protect lumber from the elements and give you much more control over the environment. Even an unheated garage offers more consistent conditions than storing lumber outdoors under a tarp.
Once you’ve chosen your storage spot, it’s time to tackle external factors that could expose your lumber to uneven conditions that spell trouble.
Avoiding Direct Sunlight and Ground Moisture
Direct sunlight is a major culprit when it comes to warping – it’s honestly one of the worst things you can expose your lumber to. UV rays heat the exposed surface of the wood much faster than the shaded side, causing uneven expansion that leads to problems. If you have no choice but to store lumber outdoors, place it on the north side of a building where it’s shaded for most of the day.
Make sure to elevate your lumber at least 4 inches off the ground to prevent it from soaking up ground moisture and to allow air to circulate underneath. Be cautious with concrete floors – they can get cold and produce condensation, which can lead to serious moisture issues over time.
Use pressure-treated wood, concrete blocks, or metal racks as a solid base for your storage system.
For outdoor storage, build a raised platform using 2x4s or 4x4s as runners. The platform should extend at least 6 inches beyond your lumber stack on all sides to keep rain from splashing up onto the wood. If possible, store your lumber under roof overhangs or in covered areas. A lean-to structure or the overhang of an existing building can shield your wood from rain and snow while still allowing for crucial ventilation.
Using a Moisture Meter
Once you’ve set up the right storage environment, it’s smart to confirm the conditions with a moisture meter – this tool will become your best friend! For indoor projects, the target moisture content is 6–8%. Check multiple spots on each board, and keep an eye on readings monthly, especially during seasonal changes when things can shift quickly.
Pinless moisture meters are a wonderful tool for this job. They use electromagnetic waves to measure moisture without leaving pinholes in the wood. While they cost more – typically between $75 and $200 – they’re perfect for checking expensive hardwoods or finished lumber where holes would be problematic.
If you’re using a pin-type meter, or even a pinless one, make sure the moisture is consistent across the entire board. Wood doesn’t dry evenly, so one part may read 8% while another reads 12%. Always go with the highest reading to determine if the board is ready to use – it’s better to be cautious!
For larger projects, like building a barn with our plans, proper moisture levels are especially important. Well-seasoned, stable lumber can prevent future problems, particularly with less stable species of timber. Our material cut lists and plans specify the lumber grades and sizes you’ll need, but it’s up to you to store and acclimate the wood properly before construction begins. Doing so will help ensure your barn stands strong for years to come.
Stacking Techniques for Maximum Stability
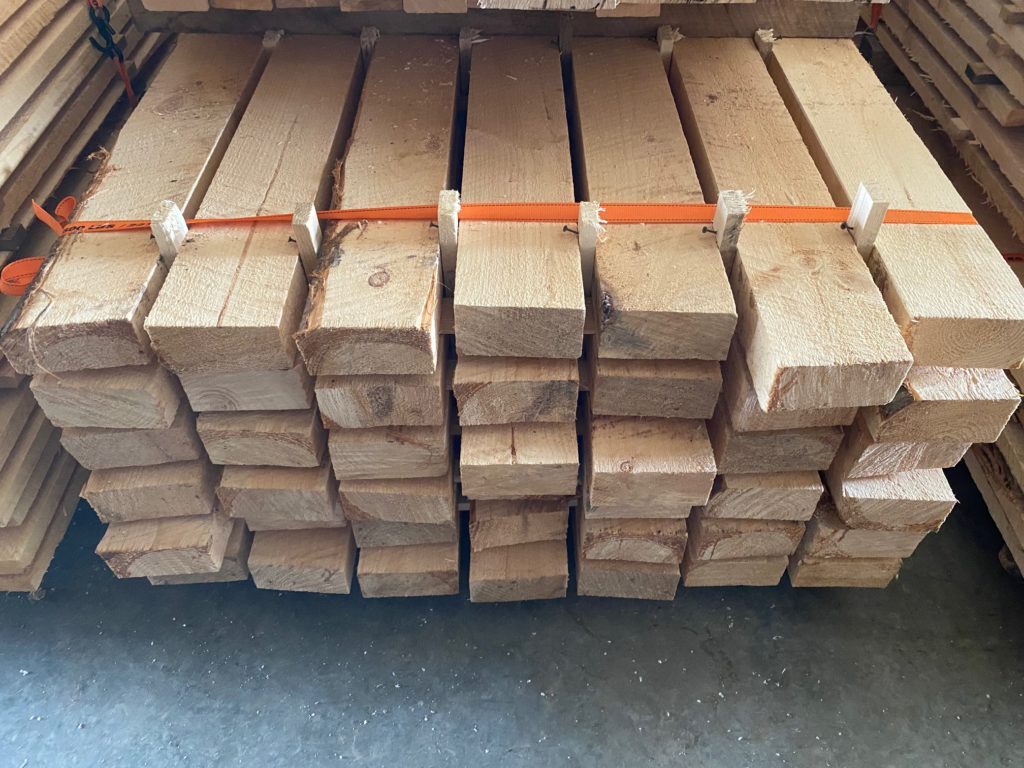
Once you’ve chosen the storage location, the next step is stacking your lumber correctly. Proper stacking ensures stability and helps prevent warping, keeping your boards in the condition you need them.
Flat Stacking with Stickers
Flat stacking with stickers is a reliable way to promote even airflow around your lumber – and it’s honestly one of the most important techniques you can master. Stickers are thin wooden strips placed between each layer of boards, creating gaps that allow air to circulate and reduce the risk of moisture buildup.
Here’s how to do it right:
Use stickers that are 3/4 to 1 inch thick and 1 to 1.5 inches wide. Dry pine or poplar are excellent choices for this job. Avoid green or wet wood, as it can introduce moisture into your stack – the last thing you want!
Cut stickers about 2 inches longer than your boards’ width, so they extend slightly beyond the stack on both sides for optimal airflow.
Place stickers every 16–24 inches along the length of the boards. For example, an 8-foot board would need about four stickers per layer to provide proper support.
Align the stickers vertically from bottom to top. Misaligned stickers can create pressure points, causing boards to bend or twist in ways you definitely don’t want.
Start the stack on a solid, level base, such as a raised platform or concrete blocks. Lay the first row of boards with edges touching, then add stickers across the width of the stack. Place the next layer of boards perpendicular to the stickers below, and repeat the process. Check alignment every few layers to ensure the stack remains even and stable.
Weight Distribution and Stability
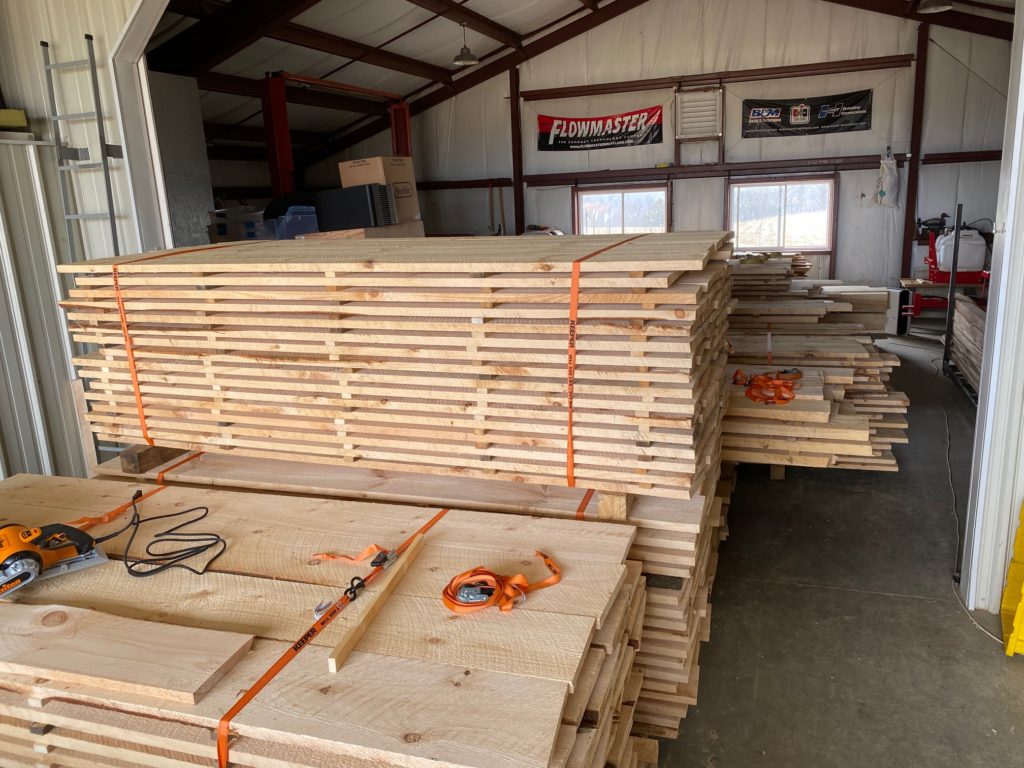
Balancing the weight of your stack is crucial to keeping your lumber flat and stable – think of it as building a foundation that won’t let you down. Start by placing your heaviest and thickest boards on the bottom. This creates a solid foundation and prevents lighter boards from being crushed under excessive weight.
To maintain flatness, add uniform weight to the top of the stack. Concrete blocks work well for this purpose – use one block for every 3 to 4 feet of stack length. For an 8-foot stack, two blocks should suffice. However, don’t exceed 50 to 100 pounds per stack, as too much weight can compress the wood fibers and cause problems.
If you’re stacking boards of varying thicknesses, group similar sizes together in the same layers. Mixing 1-inch boards with 2-inch boards can create uneven pressure points that lead to warping. If mixing sizes is unavoidable, place the thicker boards at the bottom and work your way up to thinner ones.
Keep your stacks no taller than 4 feet to maintain stability and make accessing the boards much easier. Taller stacks can become top-heavy and risk tipping over, especially if the foundation isn’t perfectly level. For larger quantities of lumber, opt for multiple shorter stacks instead of one tall one.
For large projects, like those using our barn plans, consistent stacking techniques are absolutely critical. Heavy timbers must remain straight and true to ensure the construction process stays on track. Warped or twisted boards can derail your timeline and increase costs significantly, so proper stacking is well worth the effort.
Moisture Control and Acclimation
Controlling moisture levels is just as important as proper stacking when it comes to preventing warping. Wood naturally expands and contracts with changes in moisture, so managing this process is key to keeping your lumber stable and ready for use.
Acclimating Lumber Before Use
Acclimation is all about letting your lumber adjust to the moisture conditions of its final environment – think of it as helping your wood get comfortable in its new home! Even if your lumber is thoroughly dried, it still needs time to stabilize, especially when moving it from storage to a workshop or construction site.
Here’s how to do it properly:
Allow the lumber to acclimate for 3–7 days in the environment where it will be used. For indoor projects, bring the boards into your workshop or garage during this time so they can adjust naturally.
The wood will gradually adjust to the surrounding temperature and humidity, ensuring it’s ready for installation without surprises.
Thicker boards may require more time to acclimate fully. During this process, stack the boards with stickers (thin spacers) to promote airflow, just as you would for long-term storage.
If the lumber is exposed to a large temperature shift – like moving from 40°F storage to a 70°F workspace – it will need extra time to stabilize and find its equilibrium.
Taking the time to acclimate your wood properly will make assembly easier and improve its long-term performance significantly.
Once acclimated, it’s crucial to protect your lumber from environmental elements. Let’s talk about covering it the right way.
Covering Lumber Stacks Correctly
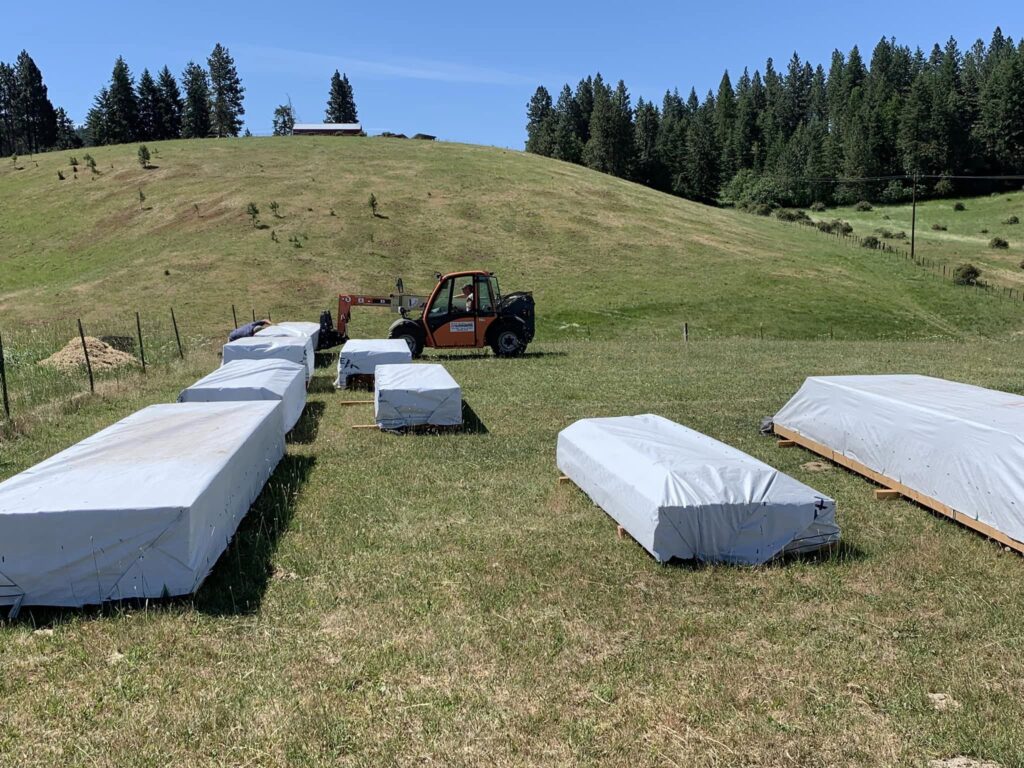
To shield your lumber from dust, debris, and light rain, use breathable covers that do the job without creating new problems. These materials protect the wood while still allowing air to circulate, which is essential for preventing moisture buildup.
Canvas tarps are an excellent choice for outdoor storage. They repel water but allow moisture vapor to escape, avoiding condensation issues that can sneak up on you. Make sure the tarp is secured so water runs off instead of pooling on top – standing water is never your friend.
Indoors, lightweight fabrics can guard lumber against dust without restricting airflow that your wood needs.
When covering your stacks, leave a 6 to 12-inch gap between the cover and the top of the lumber. This gap prevents humid air from being trapped against the wood. You can achieve this by using a lightweight frame or supports to elevate the cover above the stack.
To keep your cover in place, weigh down the edges carefully. Just be careful not to seal the stack completely – a few small gaps around the perimeter will improve ventilation while still offering the protection you need.
Avoiding Moisture-Trapping Covers
Not all covers are created equal, and some can do more harm than good – this is where many people make costly mistakes! Plastic sheeting and tarps might seem like an easy solution, but they often cause serious problems that can ruin your entire lumber investment.
Here’s why plastic covers are problematic:
They trap moisture like a greenhouse, encouraging mold growth and weakening the wood over time. Condensation builds up on the underside of the plastic as temperatures change, dripping back onto the lumber and accelerating warping in ways you don’t want to experience.
If you must use plastic sheeting temporarily – say, during a sudden rainstorm – remove it as soon as possible. Don’t leave plastic covers on for more than a day or two, and ensure there’s adequate ventilation around the edges.
Similarly, sealed containers like shipping containers or closed trailers can create issues. While they keep out rain, they often lack proper ventilation. If you’re storing lumber in such spaces, install vents or fans to improve airflow, and consider using a dehumidifier during humid conditions.
The goal is to strike a balance between protection and breathability. Your lumber needs to stay protected from the elements while still having enough airflow to maintain stable moisture levels.
Regular Maintenance and Inspection
Stored lumber, even when stacked properly and kept dry, needs consistent care to stay in good shape. Regular checkups can catch small problems before they escalate into expensive repairs – and trust me, prevention is so much cheaper than replacement!
Periodic Inspection for Damage
During humid summer months, inspect your lumber every 2–3 weeks. In drier seasons, a monthly inspection usually suffices. Spotting issues early can save your entire stock from damage and keep your projects on track.
Here’s what to look for during your inspections:
Mold and Mildew: Watch out for fuzzy growth or dark patches on the wood. If you notice these warning signs, improve airflow in your storage area immediately and remove any affected boards to prevent spread.
Decay and Rot: Healthy wood feels solid when you press on it. Press on suspect areas – if it’s spongy or crumbles, rot has likely set in and you’ll need to act quickly.
Insect Activity: Look for small holes or piles of sawdust, which could signal pests that can spread to your entire stock.
Moisture Damage: Signs like uneven drying, water stains, or unusually heavy boards may indicate excess moisture that needs addressing.
Addressing these problems early can sometimes allow you to salvage the wood for less demanding uses. Once your inspection is complete, keeping your inventory in order is essential to preserving its quality.
Rotating Stock
Regular inspections naturally tie into the habit of rotating your lumber stock – think “first in, first out” like a grocery store! To keep your inventory fresh and prevent deterioration, always use the oldest boards first.
Organize your storage so the older boards are easy to access and newer ones are placed behind them. This method encourages even drying and reduces the risk of deterioration that can happen when boards sit too long.
Additionally, rearranging your stacks periodically improves air circulation around all your lumber. Better airflow helps prevent moisture buildup, especially in boards that have stayed in the same position for too long.
Storing lumber properly is a critical step in any barn construction project. The techniques you’ve learned – like stacking, managing moisture, and performing regular maintenance – are essential, especially if you’re using self-sourced materials or building with green lumber.
How We Help with Lumber Guidance
Our resources are designed to take you from lumber storage to barn construction with ease and confidence. For example, our material cut lists provide exact timber requirements for each barn design. This helps you determine how much lumber you need to store and the dimensions required, reducing waste and eliminating unnecessary guesswork that can cost time and money.
Our video tutorials are another invaluable resource that complement your storage efforts perfectly. These guides cover essential techniques for handling both purchased and self-sourced lumber. They show you how to move lumber from your storage area to the construction site without causing warping or damage, perfectly complementing your existing storage practices.
We also offer advice on sourcing and milling local lumber. Our guidance ensures your materials meet proper moisture levels and acclimate correctly, so your lumber performs as expected during construction.
Combining Resources for a Stronger Build
When you pair our barn plans with careful lumber storage, you set yourself up for success from the very beginning. Our barn plans are designed to work with a variety of lumber sources, making your storage efforts more adaptable and cost-efficient. Plus, our downloadable plans and 3D CAD models help you visualize how every piece of stored lumber will fit into your barn’s design.
If you’re looking for ongoing support, our membership options are worth exploring. Membership includes access to updated plans and a barn-building course that reinforces proper lumber handling techniques from storage to final construction.
We also connect you with a dedicated online community of builders who understand the challenges you’re facing. This network is a goldmine of practical advice, with members sharing tips on regional climate challenges, local lumber sources, and storage modifications that work in different parts of the United States.
For more personalized help, our email support is available to answer specific questions about lumber storage or construction. Whether you’re troubleshooting a moisture issue or need advice on adapting plans to your materials, this feature bridges the gap between general guidelines and the unique needs of your project.
Conclusion: Key Points for Preventing Warping
Keeping lumber straight and stable boils down to three main practices: managing moisture, stacking properly, and routine inspections. Together, these steps ensure your wood stays in good shape and ready for use when you need it.
Managing moisture is the cornerstone of preventing warping. Store your lumber in cool, dry, and well-ventilated spaces, away from direct sunlight and ground moisture. Even pressure-treated wood can warp if it’s not elevated to allow proper airflow. Consistency is key – uneven drying on one side of the board can lead to problems that could have been easily avoided.
Proper stacking is just as important for long-term success. Always elevate your lumber off the ground using pallets or blocks. Place evenly spaced stickers (around 1-by-1 inch) between layers to promote airflow. Heavier and longer boards should go at the bottom, with stickers aligned to evenly spread the weight across your stack.
Routine inspections and maintenance help you catch small issues before they turn into big, expensive problems. Check your stacks regularly for signs of mold, pests, water damage, or warping. Rotate your stock to use older boards first, and reseal the ends of boards if needed to maintain their integrity.
Your choice of covering also matters significantly. Use breathable, waterproof covers that protect the lumber from rain but allow moisture to escape, reducing the risk of condensation. Avoid plastic sheeting, which can trap moisture and lead to warping or decay.
Here’s a quick checklist to keep in mind:
Make sure the base is level and elevated properly Align stickers vertically at regular intervals Place heavier boards at the bottom, applying top weight if necessary Keep the sides open for airflow Protect the top from sun and rain with appropriate covers
For even more guidance, check out our barn-building resources. Whether you’re working with purchased lumber or locally sourced materials, these tips will help ensure your wood stays straight, stable, and ready for your next project.
FAQs
What are common mistakes to avoid when storing lumber to prevent warping?
Warping is a common issue with lumber, and it often stems from improper storage practices that are easily avoidable once you know what to watch for. Here are some frequent missteps to avoid:
Lack of airflow between boards: Wood needs breathing room to stay stable. Without space for air to circulate, moisture levels can become uneven, increasing the chance of warping significantly.
Placing lumber on damp or uneven surfaces: When wood sits on a wet or slanted base, moisture can seep in or uneven pressure may distort its shape over time.
Neglecting to manage humidity: High or fluctuating humidity levels can make lumber expand and contract unevenly, which is a recipe for warping disasters.
To prevent these problems, always store your lumber in a dry, well-ventilated area. Use spacers (also known as stickers) between the boards to ensure proper airflow. Taking a little extra care during storage can go a long way in keeping your lumber straight and ready for your next project.
How do I know if my lumber is ready to use for my project?
Before you start your project, make sure your lumber’s moisture content (MC) aligns with the conditions of its final environment – this step is crucial for success! For indoor projects, aim for an MC of 6-8%. A moisture meter is your best tool for checking this accurately.
Keep an eye on the readings over time to ensure the wood remains stable. When the MC holds steady, it means the wood has acclimated properly, reducing the chances of warping or shrinking after installation – problems that can ruin an otherwise perfect project.
What tools can I use to check and maintain the right moisture levels in stored lumber?
To keep track of moisture levels in lumber, pin-type and pinless moisture meters are practical and reliable tools that will serve you well. Brands like Wagner and Delmhorst are widely recognized for their precision and dependability in the industry.
Using these meters ensures your lumber maintains the right moisture balance, helping to prevent issues like warping or cracking during storage. Regularly checking with a moisture meter is an easy and effective method to safeguard your wood investment and maintain its quality for years to come.

Recent Comments